To generate revenue effectively, you can use Google Ads and other options to monetize your website. In this article you’ll find the best ad networks to earn money by showing ads on your blog or website.
Instead of making an endless list with all the options and its features, I am going to tell you which is the top and most practical ad network for small and big publishers/bloggers and why, making a comparison between two of the main advertising networks (Google Adsense and its alternative Ezoic). So you can start directly to monetize your site, quickly and easily.
When should I start monetizing my blog or website with ads?
There are two ways to look at it. From an economic point of view, if you have few visits you are not going to earn a significant amount of money showing ads. So many times it is recommended to wait until you have enough traffic to monetize. I personally don’t see it that way.
When you start your small blog or online business, your worst enemy is going to be the psychological aspect. Since surely you are going to be investing a lot of time and effort in learning how to make a website and how to get it to rank high in searches, and at first you are not going to see any results. And the situation is even more difficult if you find yourself in an environment that does not support you or with which you cannot share your plan for the future.
I personally recommend that you use the first few months to shape your website. Create a good homepage where you talk about your project and what kind of content or services you offer, add a privacy policy and write some posts that look professional and where you offer well-structured and quality content. And, when your website has a good presentation and it is seen that it is a serious project. I would start monetizing it with ads.
In the beginning you will have few visits and you will earn little money, but if you start monetizing from the beginning with ads (which is the easiest way to monetize) you will have a small financial reward, and it will help you show yourself that what you are doing is working and that if you are able to generate a dollar, you can generate 10, and then 100 and from here to infinity and beyond. It’s like little candies that will help you keep going when your project is still small and needs a little more time to grow.
Google Adsense
The ad network most people start with is Adsense, the ad network owned by Google (and it’s also the one I started with). You do not need to receive a minimum of monthly visits to your website to be part of the program. And, in addition, it is a free service for you and you will not have to pay anything.
Requirements to join Google Adsense
Google Adsense requirements are:
- the content of your website must be original to the site, and not copied from other sources
- you must be over 18 years old
- and you must comply with Google’s policies (these policies are also relevant to the other ad network I’m going to tell you about). Very briefly, Google’s policies are:
- The clicks received on the ads must be organic, that is, that you cannot incentivize or pay for people to click.
- No content related to scams or illegal activities
- Compromised content will not be monetized, ie adult content, violence, weapons, tobacco, alcohol and other drugs, gambling, medication.

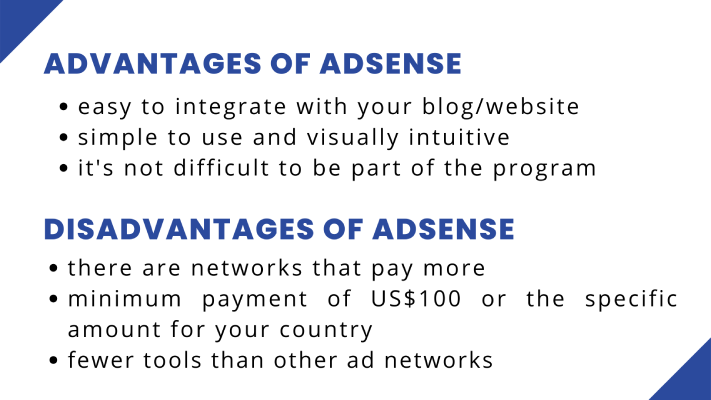
Advantages of Google Adsense
Adsense has two strengths. The first is that it is very easy to integrate with your website or blog, and it is a simple, visually intuitive platform.
The second strong point is that it is not difficult at all to be part of their program, since the minimum requirements are very easy to meet. But that the requirements are easy to meet does not mean that anyone will be accepted. This is why I recommend that you shape your blog so that it looks serious, professional and reliable.
Disadvantages of Google Adsense
I mainly see 3 drawbacks to decide to use an alternative to Google Adsense:
- It is not one of the best paid programs and with another network you could be earning more.
- In addition, the minimum amount of earnings that you have to accumulate to be able to request a payment is $100 or the specific amount for your country, in my case, as an spanish resident the amount is €70. You won’t lose the money that you have earned in a certain month, but it will be accumulated in your Google Adsense account.
The problem is that, if you receive little traffic, $100 is a difficult amount to accumulate, and it can take long months to collect.
- And the last drawback is that Adsense doesn’t offer as many features and benefits as other ad networks. Its simplicity is good because it is easy to use, but at the same time Google Adsense falls short.
Ezoic: The alternative to Google Adsense
Personally I would not recommend starting with Adsense, because it will not give you enough and you have better options. In my case, I started monetizing with Adsense and after a few months I decided to try Ezoic (👉link to the platform)
What is Ezoic?
Ezoic is a platform (ad network) that allows you to display ads on your website or blog and get paid to do so. It is an easy and fast way to monetize your website and generate monthly income passively.
It has the advantage of working with an artificial intelligence that makes decisions based on the information of the page and the visitor individually, in this way not only will your income increase but the user experience will improve.
Why Ezoic?
I recommend using Ezoic because of 6 very simple reasons:
- Ezoic pays more than Adsense
- It’s also a free service and you will not have to pay anything.
- It’s still easy to set up and use (although not as easy as Adsense). In this article you’ll find a tutorial to set up Ezoic step by step.
- Gives you more options and tools that are very useful
- Unlike Adsense, the minimum balance you need to have in your Ezoic account to receive a payment is $20. This is much better for blogs or websites that don’t get a lot of traffic.
- They have a really good customer service in several languages (Spanish among them). The main customer service is in English, but they also have native speakers of other languages to assist you.
Requirements to join Ezoic
Let’s start with the requirements that you must meet in order to display Ezoic ads on your website or blog.
- Ezoic does not have a minimum number of monthly visits (traffic), so a blog or website that receives little traffic can also send a request. You may have read or heard that there is a requirement of 10,000 visits per month, but Ezoic have changed it and it is no longer the case,
- And apart from this, you have to comply with Google’s policies, which are the ones I told you about before.

Ezoic tools
Now I am going to tell you about some of the tools that Ezoic offers and that are very worthwhile, and then I will tell you step by step how you can register on this platform.
Possibility to show adsense ads
One of the most interesting features of Ezoic is the option to show Adsense ads together with Ezoic ads. The ads from the two platforms will compete with each other and those that imply a greater economic benefit for you will be shown.
This is just a possibility that you have, but to be able to monetize with Ezoic you do not necessarily need to have an Adsense account.
Monetize videos on your website/blog
You can upload your YouTube videos to the platform so that they appear on your website. For example, if you have a website about recipes, you can write an article about a certain recipe and add the relevant video.
When someone visits the page, the video will start playing and will show ads so you can earn extra money.
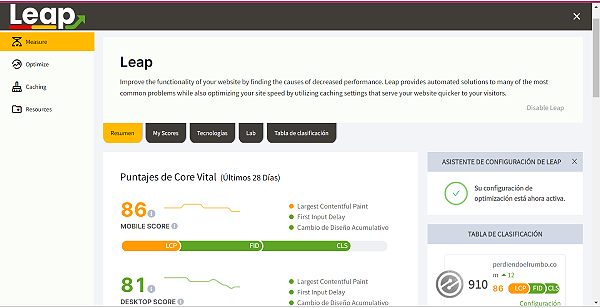
SPEED OPTIMIZATION with Leap
The third feature that’s really worth talking about is the Leap tool. It detects the changes that can be made to your website or blog to improve the speed of your site.
It also offers you alternatives and recommendations that you can follow to optimize loading speed.
Tutorial to SIGN UP for Ezoic
I will tell you step by step how to start monetizing with Ezoic’s ad network. First you will have to go to this page to 👉SIGN UP to EZOIC.
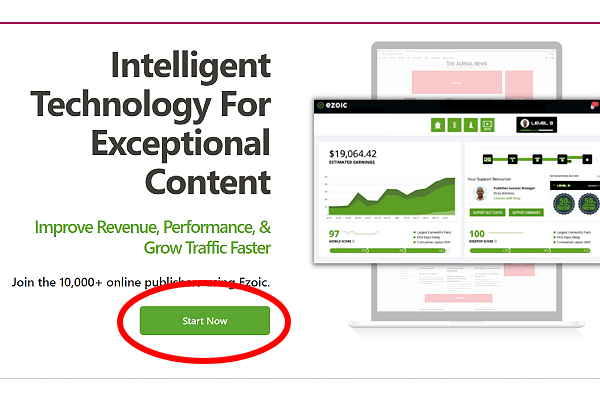
The link above will take you to the page that you’ll see in the image below. The first steps are very simple and clear, and there is no way to get confused if you follow these instructions.
On this page you have to click on the “Start Now” button which you will see highlighted in red in the image.
On the next page you will see two options. The first is for websites with fewer than 10,000 monthly visits (left) and the second for more than 10,000 monthly visits (right).
You will only have to hit the green “Join access Now” button if your blog/web receives less than 10,000 visits, or “Get Started” if it receives more than 10,000 monthly visits.

In the next step, you will have to enter your email. In the second field you will have to re-enter your email to check that it is spelled correctly.
Then click on the green button that says “Continue”.

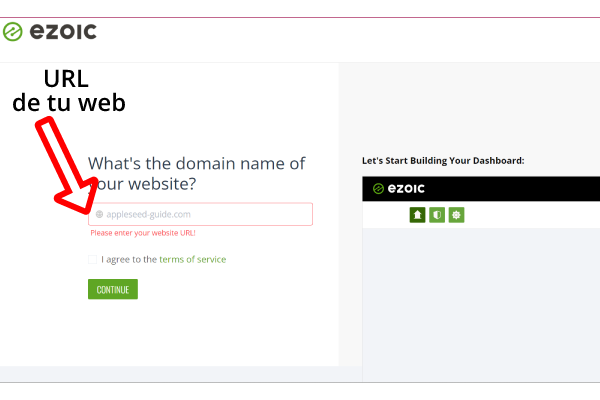
Here you must enter the domain of your website, that is, the URL. For example, the domain of my website would be perdiendoelrumbo.com
Then click the “I agree to the terms of service” box to confirm that you agree to the terms of service.
And finally click on the green button where it says “continue”.
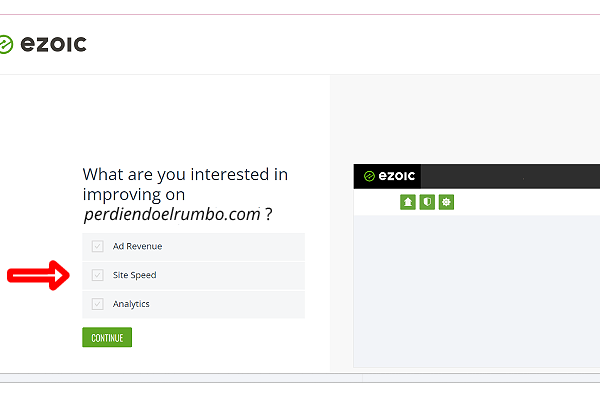
In this step Ezoic asks you what you want to improve on your website, and it gives you 3 options:
- Ad revenue: make more money with ads
- Site speed: improve the speed of your website/blog
- Analytics: statistical data about your website or blog
Check the options that interest you. Do not worry because this will not influence the services that Ezoic offers you.
Once you have checked them, click the green button where it says “Continue”.
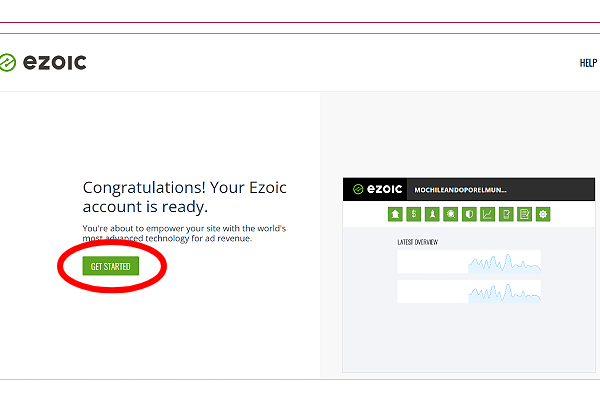
On the next screen, Ezoic notifies you that your account is ready. Click “Get started”.
Complete Ezoic’s Account Setup
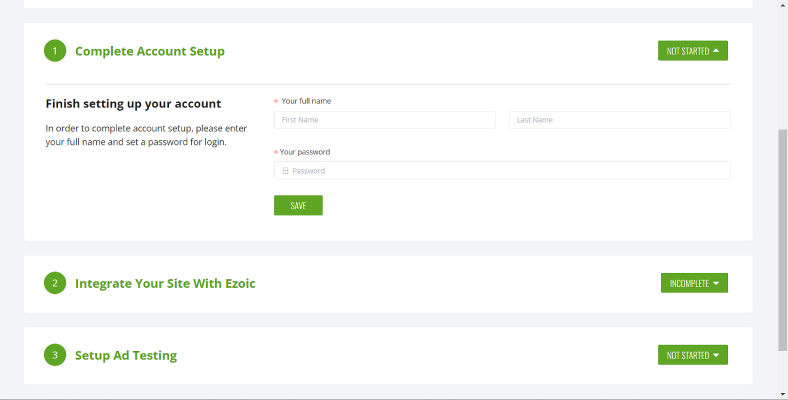
In the next 3 steps, you will have to finish configuring your Ezoic account. Let’s start with the first “1. Complete Account Setup”.
This is very quick and easy, you just need to write your full name and choose a password for your Ezoic account.
Then click “Save”.
Integrate your site with Ezoic
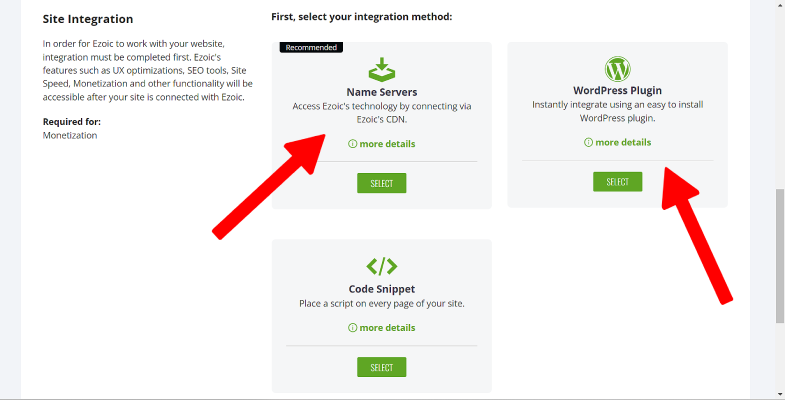
Now let’s start with step “2. Integrate your site with Ezoic”. You have 3 ways to integrate your web page: changing the names of your web servers, using a WordPress plugin (in case you use WordPress) or with a code snippet.
I recommend that you use one of the first two as they are the easiest.
- Changing your nameservers: may be scary at first glance, but it’s incredibly simple. You only have to contact the customer service of your Hosting and ask them to change your name servers for the ones that Ezoic will give you when you click the green button where it says “Select”. That’s it!
- With a WordPress plugin: in case you are using WordPress, you can click on the “Select” button and install and activate the plugin indicated by Ezoic. Once done, your site will already be integrated.
Setup Ezoic’s ad testing
In step “3. Setup ad testing” you will find 5 actions that you must take in order to finish setting up your Ezoic account and be able to show ads on your website/blog. Cheer up, when you finish this step, everything will be setted up!
Connect your site to Google
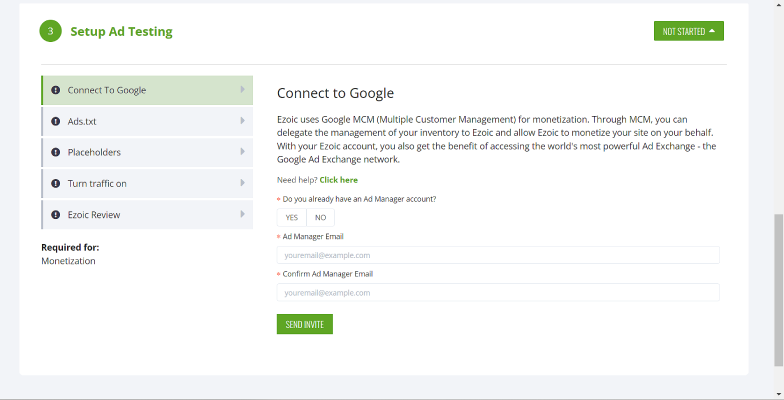
Let’s start with the first action: Connect to Google (I remind you that it is not essential to have an Adsense account beforehand to use Ezoic).
Ezoic will ask you if you have a Google Ad Manager account, and this is what you should do depending on your specific case. If you don’t know whether or not you have a Google Ad Manager account, choose an option as if you don’t have it:
- If you have a Google Ad Manager account: select “yes” and enter the appropriate email address and network code. If you don’t know what your code is, follow these instructions
- If you DO NOT have a Google Ad Manager account BUT DO have a Google ADSENSE account: click the “no” button and enter your Google Adsense email address.
- If you do NOT have a Google Ad Manager account AND NEITHER a Google adsense account: click “no” and enter an email address to associate a Google Ad Manager account.
You will receive a notification from Google in the email you entered.
Create Ads.txt on Ezoic
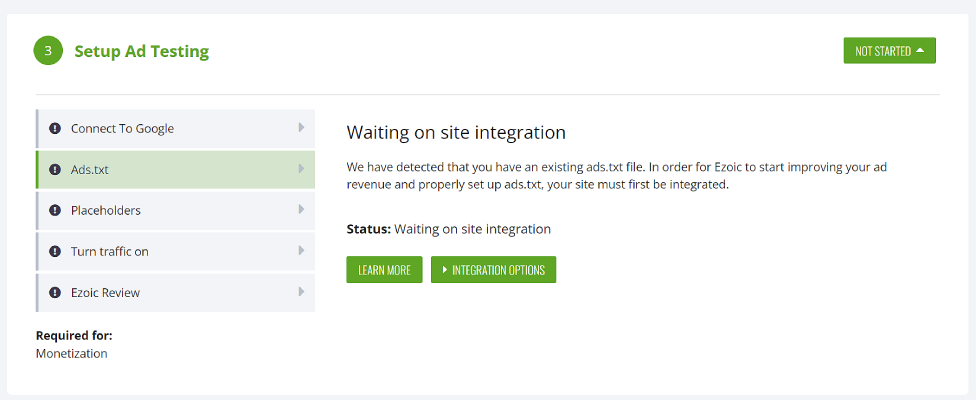
Once you’ve connected your site to Google Ad Manager, you can move on to the second action “2. Ads.txt”. The screen that will appear will be a little different from the one in the image, since in the example the site has not yet been integrated.
- In this step, if you already have an ads.txt file on your website, Ezoic will detect it and add automatically its authorized sellers (just follow the instructions that Ezoic gives you).
- If you need to create an ads.txt file and you have used the integration via the WordPress plugin, you will need to use the Ads.txt Manager for your ads.txt file to work properly. You’ll find a more detailed explanation in this link.
Remember that if you have any questions or problems, you can always contact Ezoic’s customer service. If you have to upload the ads.txt file to your website, contact the service customer service of your Hosting and they will do it for you.
Set up Ezoic’s placeholders
Now we are going to set up the placeholders, that is, the areas on your page where the ads will be placed.
- If you use wordpress , I recommend that you set up the placeholders using the recommended plugin, since it is very simple, fast and you won’t have to worry about anything.
After installing and activating the plugin, go to the settings. Then go to the “Ad Settings” tab. Here you should look for a button where it says “Let’s go” and click it. You will need to wait a few minutes for the placeholders to be created.
If there are already previously created placeholders on your website, you will see the message “Default ad placeholders not created”. In this case, you must click the button below that says “Generate default placeholders”, to confirm that you really want to create them.
- If you are NOT using wordpress, click the “Get Started” button and follow Ezoic’s instructions. In this link you can find all the information to create placeholders with the chrome extension.
The problem is that this step can be a bit confusing if you use the Chrome extension. What I would do (before touching anything and getting overwhelmed) is send an email to Ezoic and ask if your account manager can set up the placeholders for you. This way you will save time and avoid headaches.

Contacting Ezoic to create ad placeholders
Here are the steps to contact Ezoic to set up ad placeholders on your website or blog:
- go to this link. this is where all the emails that you exchange with ezoic are saved. they use the word “ticket” instead of email.
- if it’s your first email with ezoic, it will take you directly to the correct screen. Otherwise, click on the green button that says “submit a new request.”
- now, select the topic “ad placeholder setup”.
- write a subject, for example, “creating ad placeholders.”
- next, links to recommended articles will appear to try to solve your question. Ignore these articles. At the end of the list of articles, you will see a button that says “these articles were not helpful.” Click the button.
- on the next screen, fill in the “domain url” field with your website’s domain.
- in the body of the message, kindly ask them to configure your ad placeholders.
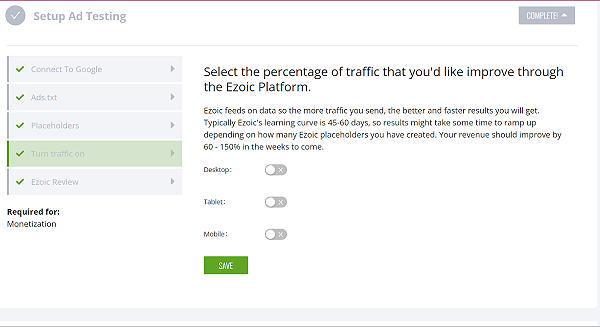
Turn traffic on
Let’s go to the second last step “Turn traffic on”. On this screen you have to select on which devices you want to display ads. That is, when someone visits your website from a computer, tablet or mobile.
I recommend that you activate all three options in order to earn more by displaying ads on your blog/website
Ezoic approval of your site
And now the final step! You basically don’t have to do anything here, just wait for Ezoic to review your website and approve it.
As you can see in the image below, when Ezoic approves your website or blog, where it says “Status” the word “approved” will appear.
